Advanced Anterior View Assessment
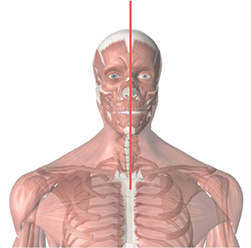
Midsagittal Plane
– Using a plumb line bisect the manubrium.
– Reference the alignment of the manubrium, chin and nose.
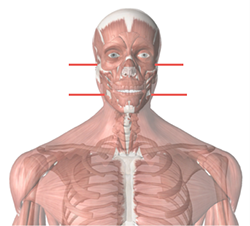
Temporal Bones
– Correct any head tilt to align the head. With fingers parallel to the floor place fingers into the external auditory meatus on either side to the rear upmost position along the bony surface.
Occiput
– Correct any head tilt to align the head.
– With fingers parallel to the floor hook the fingers under the occipital ridge.
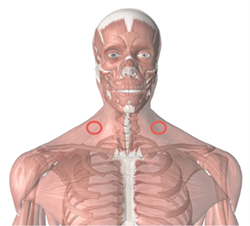
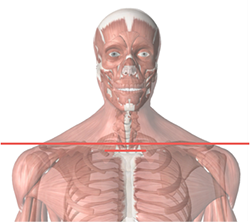
1st Rib
Scalene (Medial & Anterior) muscles can cause elevation of the first rib which in turn can cause pinching or crushing the nerves and blood vessels in the area.
Subclavius &Levatores Costarum Brevis also attaches to the first rib but these are unlikely to be a direct cause.
Cervical Rotation Lateral Flexion Test
– Rotate the head away from the painful side to end range.
– While maintaining end range rotation, attempt to laterally flex as far as possible on the tested side.
– If unable to laterally flex the head, the test is considered positive.
– As you turn your head away from the affected side, you will be unable to laterally flex your head to the affected side if you have an elevated/hypomobile first rib. This is due to the first rib blocking the transverse process of C7.
– It is an important test to see the contributions of first rib hypomobility to pain associated with the neck and upper extremity, such as some cases of Thoracic Outlet Syndrome.
Acromioclavicular Joint
– Fingers parallel to the floor place fingertips at the juncture between the tail of the clavicle and the acromion process.
Clavicular Heads
– Fingers parallel to the floor place fingertips on the superior aspect of the heads of the clavicles.
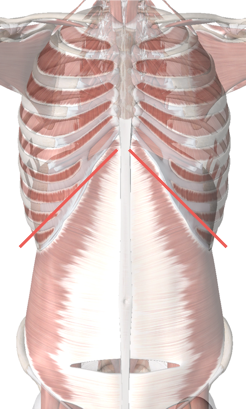
10th Rib
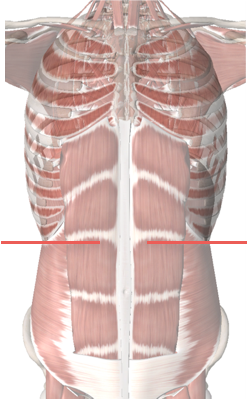
Costal Cartilage
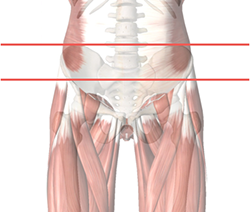
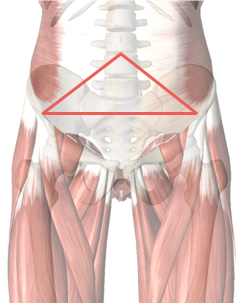
Iliac Crest
– Palms flat parallel to the floor place over superior aspect of the Iliac Crest.
Anterior Superior Iliac Spines
– Thumbs parallel to the floor, place them on the inferior aspect of the ASIS’s.
– Keeping eyes same level of pelvis determine level of the ASIS’s.
Obliquity (Pelvis)
– Have client stand back against wall (to prevent rotation).
– At the level of the ASIS place index fingers on the medial surface of the iliums.
– With eyes level with the pelvis determine which finger is closest to the midline of the body.
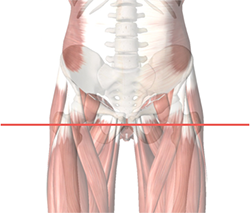
Greater Trochanter
– Palpate the superior aspect of the greater trochanter.
– Hook two fingers on each hand over this landmark parallel to the floor
– Have client shift side to side to confirm placement.
– If rotation of the pelvis is present have client stand with back against wall (to prevent rotation).
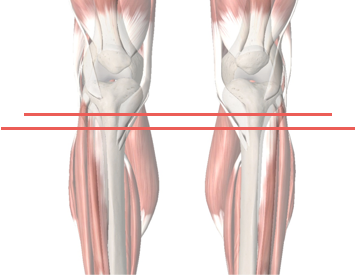
– Ensure knees are on the same plane
– Arches approximately the same height.
Tibial Tuberosity
– With your eyes at the level of the proximal end of the tibia, locate the tibial turberosity.
– With the thumbs parallel to the floor, place thumbs on the superior edge of the tibial turberosity.
Fibula Head
– From the same position locate the head of the fibula. With fingers parallel to the floor, place fingers over the most lateral edge of the fibula head.
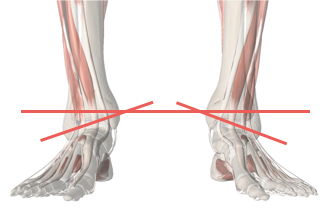
Medial Malleolus
– With fingers parallel to the floor place finger on the most medial aspect of the medial malleolus.
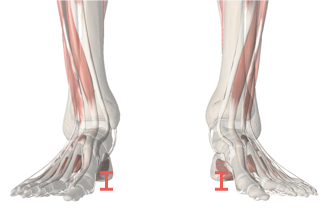
Medial/Lateral Malleolus Angle
– Measure the angle between the medial and lateral malleolus by palpating the medial aspect of the medial malleolus and the lateral aspect of the lateral malleolus then recording the angle.
Arches: Supination/Pronation
– Choose a finger on your hand that is approximately the same circumference as the index finger of the client.
– Slide the selected finger along the instep of the client.
– The finger should slide in up to the base of the distal phalanx.
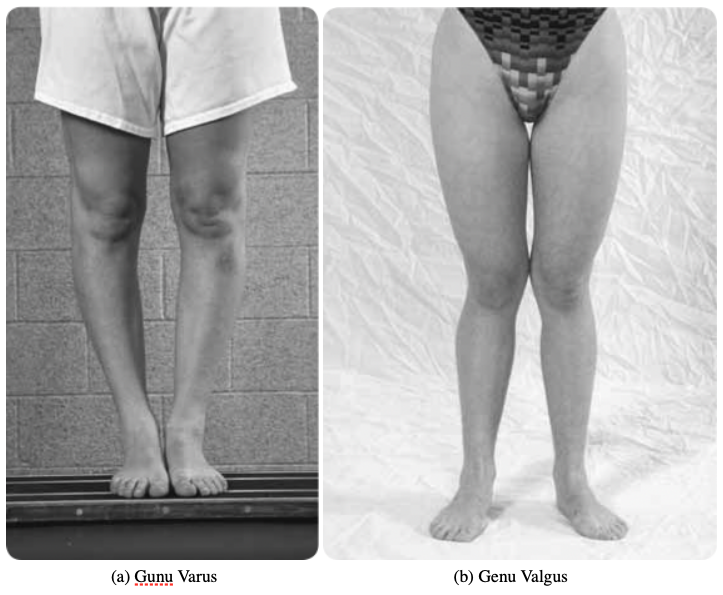
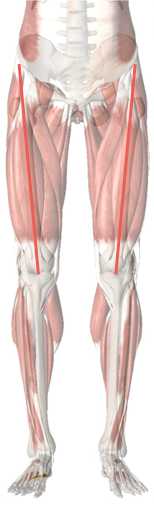
Q-Angle (Femur Angle)
– Lower normal Q-angle measurement is 10°. Upper normal values may vary for men and women because of the differences in pelvic structure and range from 11° to 18° (Holmes & Clancy, 1998).
– Q-Angle is formed in the frontal plane by two line segments
– From tibial tubercle to the middle of the patella
– From the middle of the patella to the ASIS
Three landmarks are needed to determine the Q-angle:
1. Anterior Superior Iliac Spine (ASIS): The ASIS is the front of the pelvic bone that is felt in front of the hip at the level of your waist.
2. Center of the Patella (Kneecap): The center of the kneecap is best identified by locating the top, bottom and each side of the kneecap, and then drawing intersecting lines.
3. Tibial Tubercle: The tibial tubercle is the bump about 5 centimeters below the kneecap on the front of the shin bone (tibia).
The Q-angle can change from non-weight bearing to weight bearing, because tibial rotation changes the Q-angle. If the patient has pronation in weight bearing, the tibia is medially rotated and increases the Q-angle. If the leg laterally rotates, the Q-angle decreases. A weak vastus medialis oblique (VMO) can also increase the Q-angle.
Increases or decreases in the Q-angles are associated in cadaver models with increased peak patellofemoral contact pressures (Huberti & Hayes, 1984). Insall, Falvo, & Wise (1976) implicated increased q-angle, along with patella alta, in a prospective study of patellofemoral pain.
Increases in Q-Angle are associated with:
- Genu valgum
- Increased femoral anteversion
- External tibial torsion
- Laterally positioned tibial tuberosity
- Tight lateral retinaculum